Define the Property Model Calculator
- Add a Property Model Calculator node to the System Definer. If you used the Property Models template, click the node to display the Configuration settings window.
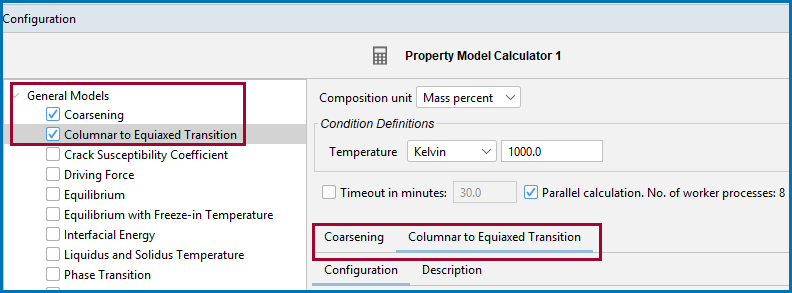
- From the left side of the Configuration window, click to select one or more of the checkboxes under the General Models. If you have licenses for the material specific libraries, you can also select and run the Property Models from the Nickel Models, Noble Metal Alloys Models, Steel Models, or Titanium Models folders.
For the material specific libraries these are only available if you have the applicable licenses. If you are interested in learning more about the available models, go to our website.
A tab with the same name as the Property Model opens in the right side of the window under Condition Definitions. When you select more than one Model at a time, a matching tab is added in the same order that the checkbox is selected.
- For each Model on the Configuration tab, select or enter settings described in Property Model Calculator: Configuration Window Settings and based on the Calculation Type chosen.
- Once you have finished defining the Property Model Calculator, you also choose settings on the Plot Renderer.
When working in the Configuration window, click the Description tab for more information about the Model.
Thermo‑Calc General Property Models Examples Collection
For tutorials about this feature, go to our website or browse the Property Model Calculator playlist on our YouTube channel.
