Custom User Credentials Installations
About User Credentials License Activations
This section is applicable to:
- Operating systems: Windows, macOS, or Linux
- Installation type: Single User (SUNLL) or Floating Network Licenses (NWL)
- License activation type: User credentials (online and offline)
- Upgrading to a new version of Thermo‑Calc (maintenance plan only)
Use the Custom option to have more control over what component features to include or exclude, for example, to exclude an SDK.
About the Thermo‑Calc Installed Components
Add New Components to an Existing Installation
Step 1: Download Thermo-Calc Software
This section uses Windows as an example, but download the applicable OS for use.
Administrative rights are required to complete this installation. An email from Thermo‑Calc Software (or from someone in your organization) includes the links and information you need to access and activate the current version of the software you want to download.
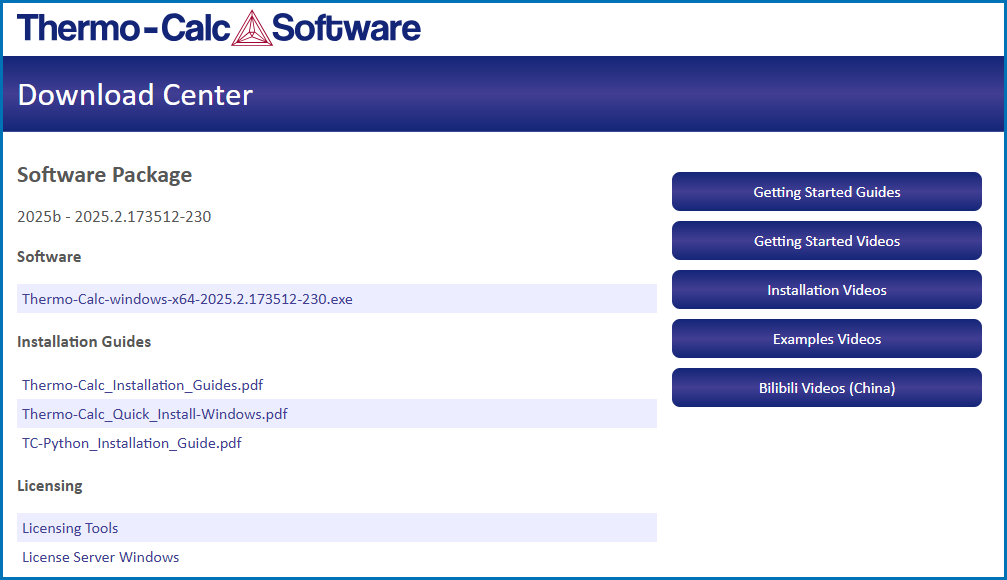
- Click the link from the email and the first page of the Download Center opens. Under the Windows section, select the OS version. Click Go to download page.
- In the Sign in to access this site window, enter the Username and Password (found in the email) and click Sign in.
- On the Download Center page under Software, click the .exe link to download the file for the current software version for your operating system (2025b).
Step 2: Select the Components to Install
- Once the download is complete, navigate to the folder where you downloaded the software. Double-click the downloaded program file (the suffix is based on the operating system). Remember that administrative rights are needed for Windows and macOS, so when you are prompted for that user name and password, enter those credentials here, not the ones sent to you from Thermo-Calc.
- Click Yes to continue.
- On the Setup - Thermo‑Calc 2025b window click Next.
- On the License Agreement window click to accept the license agreement. Click Next.
- In the Select License and Installation Mode window click Custom. Click Next.
- On the Specify Configuration window the Create Shortcut on Desktop checkbox is selected by default. Click Next.
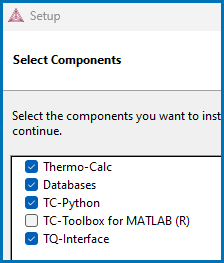
- In the Select Components window, click to select or deselect the checkboxes as needed. Click Next.
TQ-Interface is not yet available with the user credentials system.
Step 3: Finish Installing Thermo-Calc
- In the Installation Directory window, either accept the default path or enter a path to where you want to install the software. Click the file button
 to Browse for Folder and navigate to another directory.
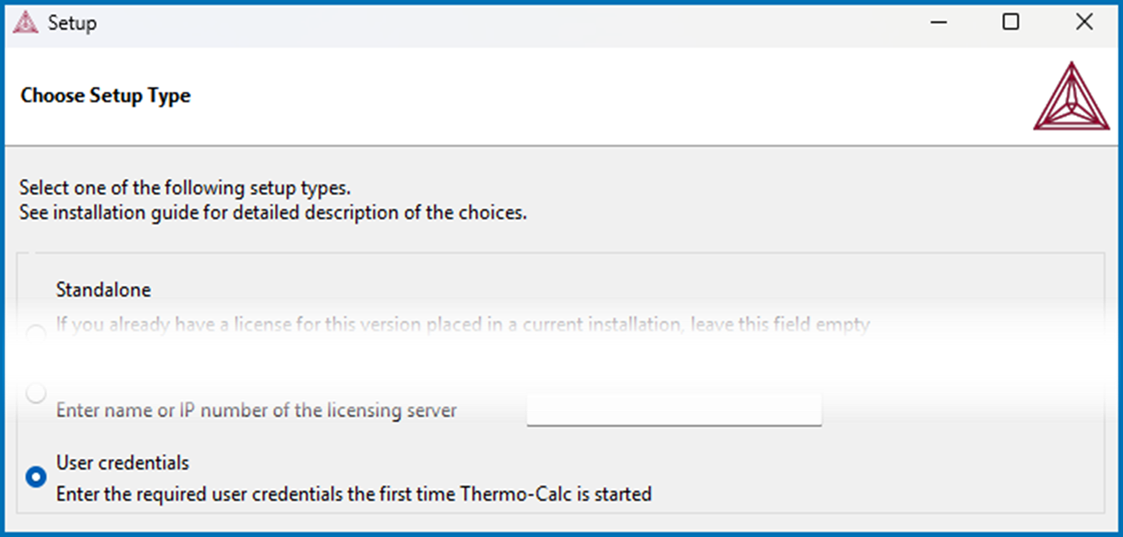
 - In the Choose Setup Type window, click User credentials.
- TC-Python is automatically installed when the User credentials option is chosen. The Install TC-Python page is a reminder for users of TC-Python that additional installation and license credential procedures are needed after Thermo-Calc is installed. Read the separate installation instructions (also included in the full installation guide) for more information if applicable. Click Next.
- In the Ready to Install window click Next.
- Click Finish and start using Thermo‑Calc. For Linux users, log out and log back in to finish the installation.
For macOS installations and if you have previous Thermo‑Calc installations: When you launch Thermo‑Calc with the new or updated version, the splash screen hides the Import User Settings dialog box. In order to proceed you need to click the splash screen and then click Yes or No in the dialog box.
Step 4: Activate the License
If your work environment does not allow an Internet connection to activate the license, as a last resort you can use the option Create offline activation file. Overall it is best to use the Activate online option as this provides more flexibility and future benefits including being able to easily update your license. See the last section for details.
- Open Thermo-Calc. The first window includes highlights from the current release. Click Close.
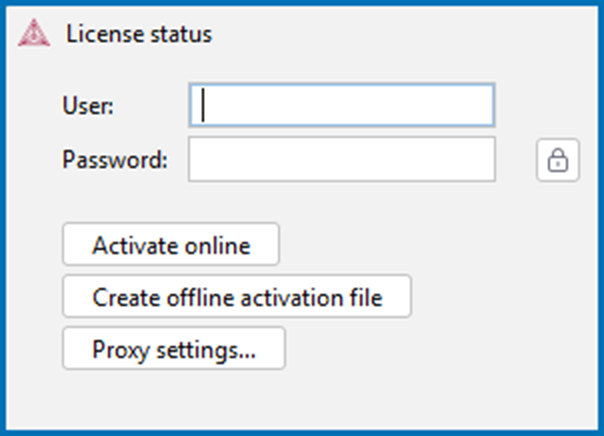
- In the License status window, enter the User and Password provided to you.
Your license user credentials are sent to you in an email from Thermo‑Calc or a representative. This is different from the Download Center login details. If you have not received the information, first ask the main Thermo-Calc contact in your organization. Otherwise, contact Support for clarification.
- If you use a proxy server, click Proxy settings. Click Use proxy and enter your information. Click OK.
- Click Activate online.
If the fields become empty when you click Activate online, this means the activation did NOT work. See the troubleshooting section for details about next steps When Activate Online Does Not Work.
-
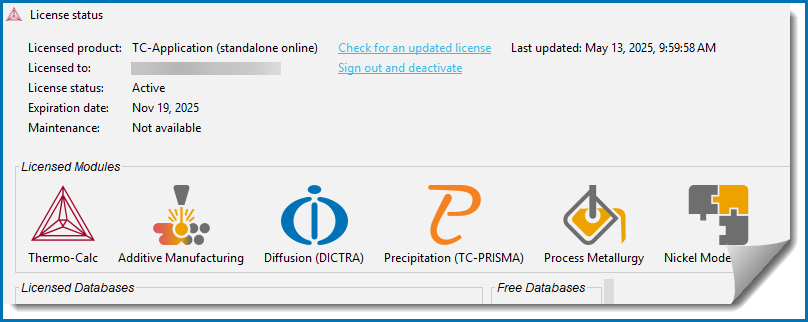
Once it is activated you will see the License status window with a list of the products you have access to. Click Close and start using Thermo‑Calc.
At any time you can view the product license information by selecting Help → Show License Info from the menu in Thermo-Calc.
Step 5: Optional Offline License Activations
Offline activations are only available for single user (SUNLL) licenses and should only be used as a last resort, i.e. if there is no option provided by your organization to achieve online activation. The computer only needs to be connected to a network during the license activation, not when working with the software.
Offline activations can be an alternative for users who are in a highly secure environment that does not allow Internet connections.
In general it is highly recommended to use the Online activation option as this provides more flexibility including faster and easier license updates, i.e. for offline activations license updates require repeating the full offline activation procedure.
You will need access to the Internet to complete the activation. You can do this either by:
- Accessing the Internet temporarily from the computer you will use Thermo-Calc on, or
- Activating the license on another computer then transferring the license to the computer you will use Thermo-Calc on.
These instructions are a continuation from previous steps and assume you have already installed Thermo-Calc and entered your user credentials.
-
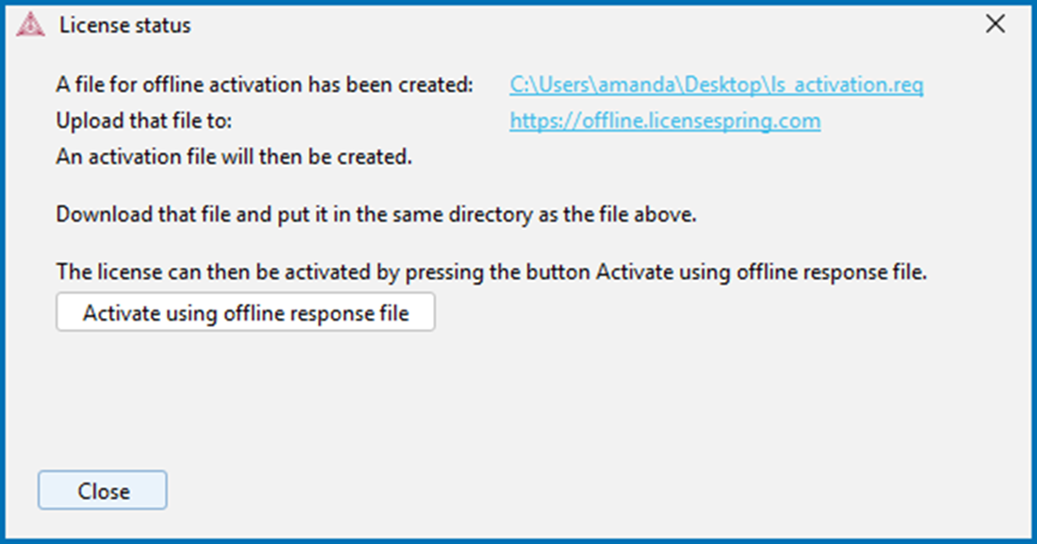
Click Create offline activation file. The License status window opens with instructions you can refer to.
-
A local file to use for the offline activation is created and the link to where it is downloaded to your computer is provided. The file is named
ls_activation.req. Click the link to go to this location on your computer.If you have downloaded the file to a computer that does not have Internet access, then copy this file to one that does and continue the process. Later you will copy the generated offline license back to the computer where Thermo-Calc is installed.
-
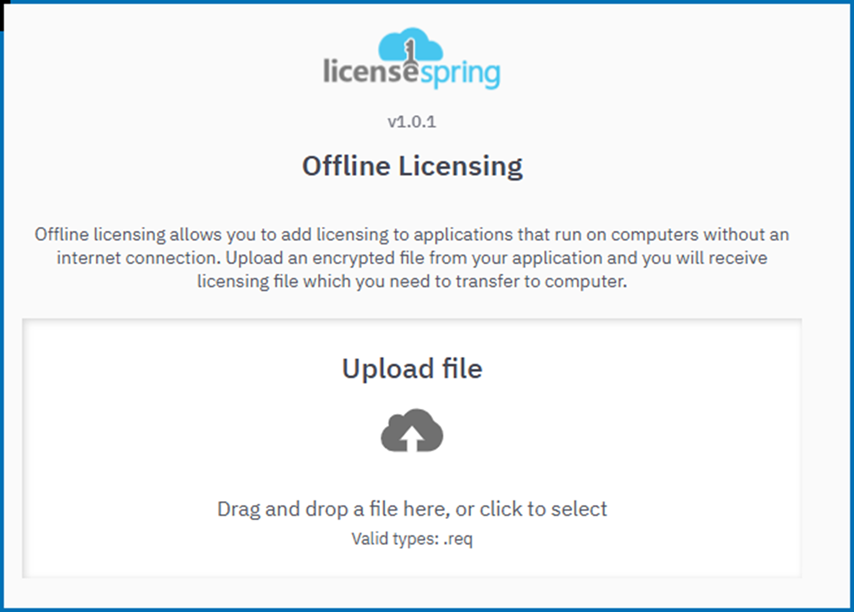
On the computer that has Internet access, go to the URL shown on the License status window: https://offline.licensespring.com.
-
Navigate to the
ls_activation.reqfile on your computer and drag and drop it into the center of the window. The program generates another file and downloads it to your computer. This file is namedls_activation.lic.As soon as the
ls_activation.reqfile is uploaded the license is considered by the software to be activated.If at this point you want to switch to an online activation instead (recommended), you can delete the
ls_activation.reqfile from the computer location to end the offline activation process. -
Navigate to the downloaded
ls_activation.licfile. If needed, this is when you copy this file back to the computer where Thermo-Calc is installed. In both cases the new file should be copied back to the same folder where the original filels_activation.reqis located. -
Once the two files are in the same folder, you are ready to generate an offline license.
-
Go to the License status window and click Activate using offline response file.
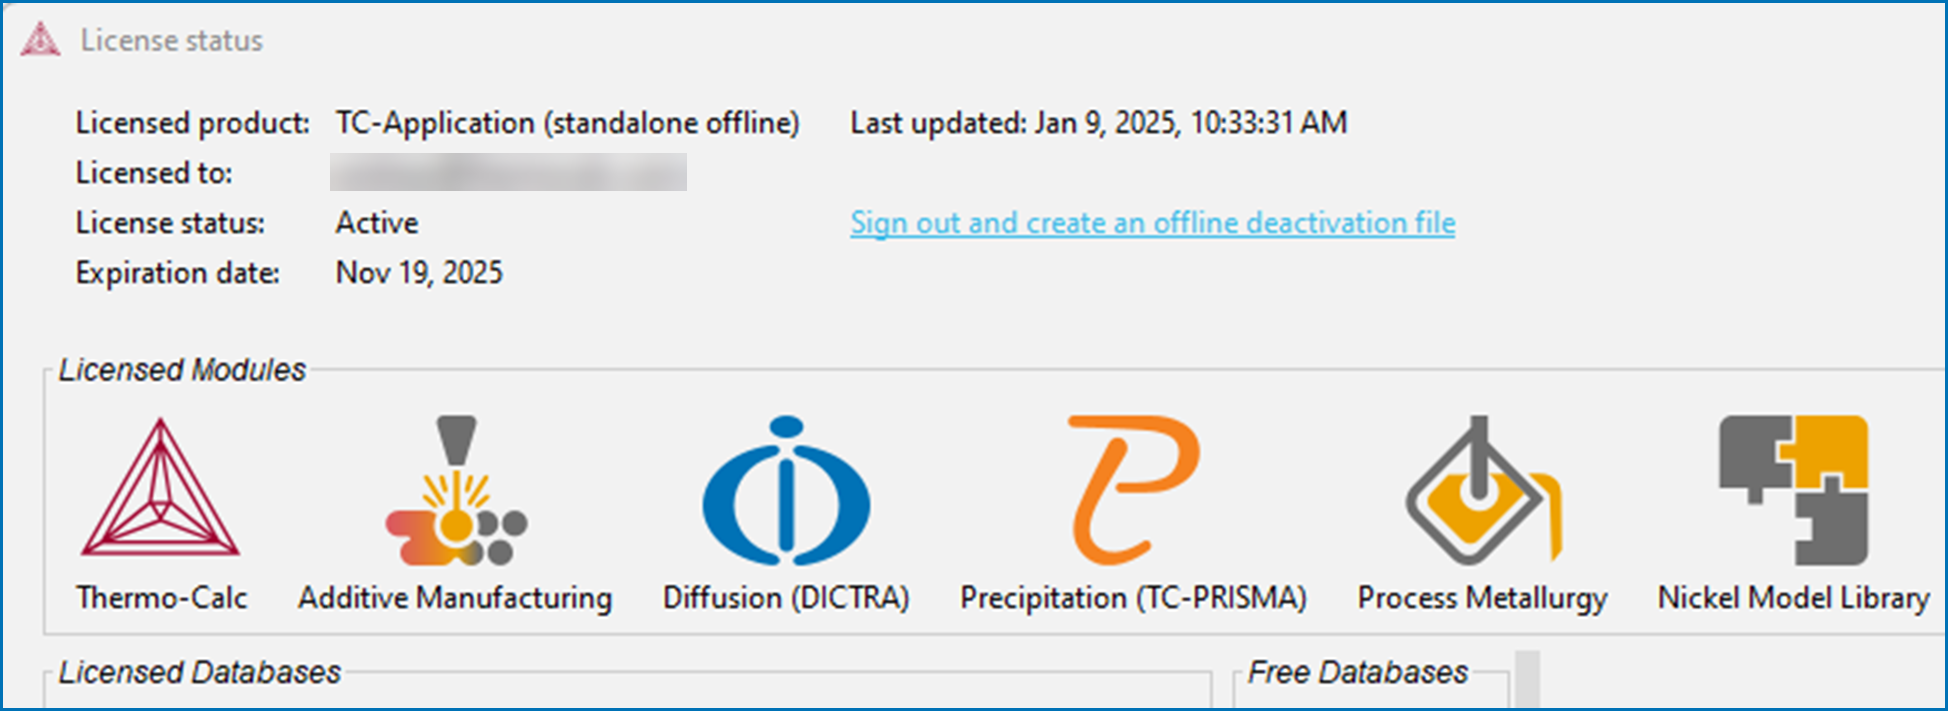
Once activated you will see the License status window with a list of the products you have access to. Click Close and start using Thermo-Calc.
-
You do not need to keep the files you downloaded. Return to where these files are downloaded and delete them.
At any time you can view the product license information by selecting Help → Show License Info from the menu in Thermo-Calc.
