Moving or Grouping Nodes and Using the Grid
In the Project window, you can work with the activity nodes in these ways.
- Select and move individual nodes
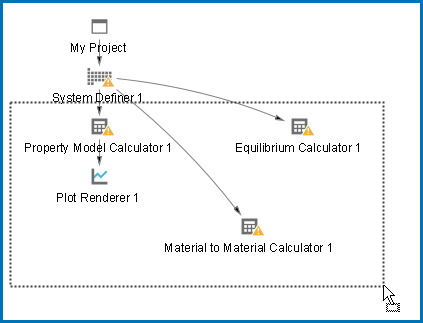
- Select several nodes at a time
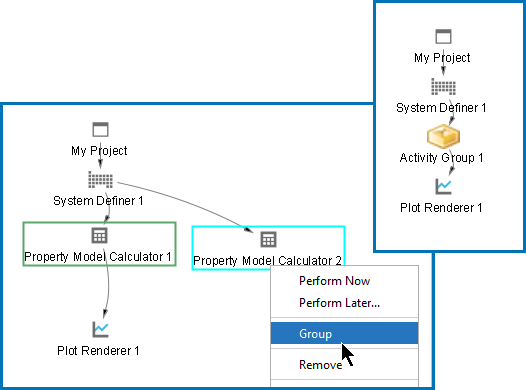
- Select and then group activity nodes
- Show the grid and "snap" to it
- Apply Auto Layout
- Click an activity node to select it.
- To move activities, click and hold the activity node and move the cursor.
You can group activity nodes together on the Project window. This also creates separate tabs on the Configuration window so you can more easily edit the settings for each one. It is important to have logical groupings of nodes because the calculation relies on this connectivity.
In the Project window, control + click to select each node, then right-click and select Group. An Activity Group node is created (you can rename it) and on the Configuration window there are two tabs created, named for each of the group nodes. For example, Property Model Calculator 1 and Property Model Calculator 2. The order of the tabs is based on the order of when you select each node.
In the Project window, right-click anywhere and choose Apply Auto Layout from the menu. The nodes and the tree default to the center of the Project window.
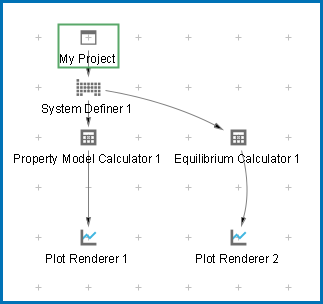
To show a grid of light grey cross-hairs overlaid on a project, click Show Grid in the toolbar. Click the button again to turn the grid off. Or right-click in the Project window and select Show Grid.
Click Snap to Grid in the toolbar or right-click in the Project window and select Snap to Grid to automatically position each activity in the Project window at a cross-hairs point in the grid.
The Project window with the grid turned on and activity nodes moved from the default location. These nodes are snapped to the grid.


